Asaka Kimono

I don’t wear a robe often, but when I do it’s with heels on a windy day in downtown Richmond in broad daylight.

As soon as I realized I was going to need a robe for Camp Workroom Social this weekend, I knew the Asaka Kimono was the pattern for me. Just. Look. At. Those. Sleeves.

img_5360

The sleeve design – two piece and wide cut, with a deep vent from wrist to elbow – is somehow both glamorous (look at them!) and functional (they won’t hang into my cup of tea or ever need to be rolled up).

img_5375

img_5374

Several seamstresses have made this garment to be worn as a dress. You can see my very favorite example here. However, I made mine out of a rather boring but soft and breathable cotton/linen blend, specifically to be worn as a robe. So the thought of going out in public to have my pictures taken was a bit awkward. (And Brian rightfully pointed out the irony when I commented on a passerby wearing his pajamas outside. Touché.) But as soon as the wind hit those sleeves, making them flutter every which way, the awkward feeling passed and I felt a bit like a super hero who happened to also be a movie star. And that led to some twirling. In the empty parking lot. With people walking by and watching.

It is unlikely that I will make this pattern again – how many robes does a girl need? – which is sort of too bad. It was a quick and easy make that really stands out between the sleeves and the nice neat collar finish.

img_5401

Pattern: Named Asaka Kimono, size 6
Fabric: Fire engine red linen/cotton blend with red velvet ribbon trim inside the sleeves
Modifications: Shortened the sleeves by 3″ but left the robe length long
Mural: By Gaia, for the 2012 G40 Art Summit in conjunction with the Richmond Mural Project presented by Art Whino. Located at 11 West Grace Street, Richmond, VA.

Ginger Jeans: Mind blown

I dislike trying on clothing in stores. Nine times out of ten, I leave the changing room disappointed. Not in the clothing, but in my body, and the fact that it doesn’t fit into industry standard clothes. I know this is silly. I know that industry standards probably fit less than half of the population, but nevertheless, I usually leave the store vowing to not eat again that day and to workout as soon as I get home. When people ask me why I sew, I’ve normally responded with a quick and easy answer like: (a) I will never show up somewhere wearing the same outfit as somebody else, or (b) that I can make an item *exactly* as I want it (more on this below). Those are two very valid reasons. But the reason I will likely never stop sewing is that it gives me the power to never judge my body against industry standards again.  Nobody (and no body)  deserves that.

This is my second pair of Ginger Jeans by Closet Case Files, a brand that in my opinion, sets itself apart by showing home seamstresses that we can, in fact, make anything we set our mind on.  (Heather is pretty much my hero.) Before I cut into my precious denim for this pair, I altered the pattern so that they would fit my body (no easy task given the 12″ difference between my was it and “full hip”): I took a wedge out of the back yoke and contoured the waistband to hug that lower back curve; since I used the high-rise version of the pattern (view B) this time, I lowered the waistline in front just a bit more than in the back to avoid peek-a-booty; and I straightened the skinny leg and then took it a bit further adding a mild flare to accommodate oxford shoes and fall boots.  And once that was done – and that took maybe an hour or two thanks to loads of useful tips from Heather – I cut and sewed my denim and slid these beauties on. And guess what. They fit like a glove. And more importantly, I even like the way they look on my body. Mind blown.

img_5272

img_5284

You’ll just need to trust me that there is no gaping in the back waist. I completely forgot to get that shot while standing on a rather busy street corner:

img_5275

As I mentioned above, a bonus to sewing your own clothes is being able to make them however you’d like. As you may have spotted, for this pair, in addition to the sizing alterations, I skipped the classic gold topstitching and opted for two shades of blue.  I was tentative about this at first but decided if I hated it I could always rip it out and re-do it.  Once I got started – I loved it.  And then I remembered Heather’s flare version here, and this happened…

img_9138

And, speaking of customizing, how often do your jeans literally match your top?!?

img_5294

I still have enough Cone Mills denim to make two, maybe even three, more pairs of jeans.  Now I just need to decide what each of those pairs will look like and how I’d like them to fit my body.  Imagine, make, wear – repeat. Sew forever.

Pattern: Closet Case Files Ginger Jeans, View B with mods for mid-rise and mild flare legs
Fabric: Cone Mills indigo S-Gene 12oz denim (88% cotton, 10% polyester, 2% lycra)
Worn withSimplicity 1462 in Anna Maria Horner Field Raindrops & Poppies cotton
Mural: “Overthink” by Onur for the Richmond Mural Project 2015 presented  by Art Whino Gallery

This is what happens when a “type A” is also a “collector”

Alternate title, how I organize and catalog my massive fabric stash.

At last count, I had 455 yards of fabric. Granted, that was a month ago – I’ve acquired and sewn quite a bit of fabric since then, but it gives you a sense of what I am up against.  When that number was smaller, in the 150-200 yard range — before I met a man who had purchased the estate of two deceased seamstresses and “needed my help” getting rid of it for $2/yard — it was folded into clear plastic bins and I’d rummage through it all as needed. Even then, there were lots of issues with this lack of a system:

  • I forgot what I had – to the point that I have three different cuts of emerald green stretch cotton sateen,
  • even if I remembered I owned it, I could certainly not recall how much of it I had,
  • I’d often dig through the bins to get a piece of fabric for a project only to realize it was thicker/thinner, drapy-er/stiffer… than what I needed,
  • I could never remember if I had pre-washed and dried it. This is critical, especially with cotton, which makes up a large portion of my “collection”.

When my yardage-on-hand doubled in the matter of a week, I knew I needed a way to catalog it all.  So I googled.

This post got me started. But I wanted more flexibility with what I tracked on each card, so I decided to just use blank index cards. I got my cards, hole puncher, key rings, stapler, scissors and measuring tape and got to work. But the issue with that system for me became apparent almost immediately — volume.  The key rings were difficult to flip through when loaded with cards and fabric swatches and I was going to need 5+ rings. Those rings would not stack neatly and were bulky.  Then it hit me — the rolodex. You know, those hunks of metal that used to sit on the corner of every desk (and if you were super-popular you had multiples); the antiques that you can buy on eBay for $20, or Etsy, for that perfectly curated vintage looking office space, for $100.  It was the perfect solution to my problem. So I bought one, along with the cards, and it all came together over a glorious weekend.

IMG_7959

Now, when I decide on a pattern I want to make, I simply flip through my rolodex and pull out the cards for each of my fabric options.  I then take those cards to my stash and pull the fabrics for review.

IMG_7961

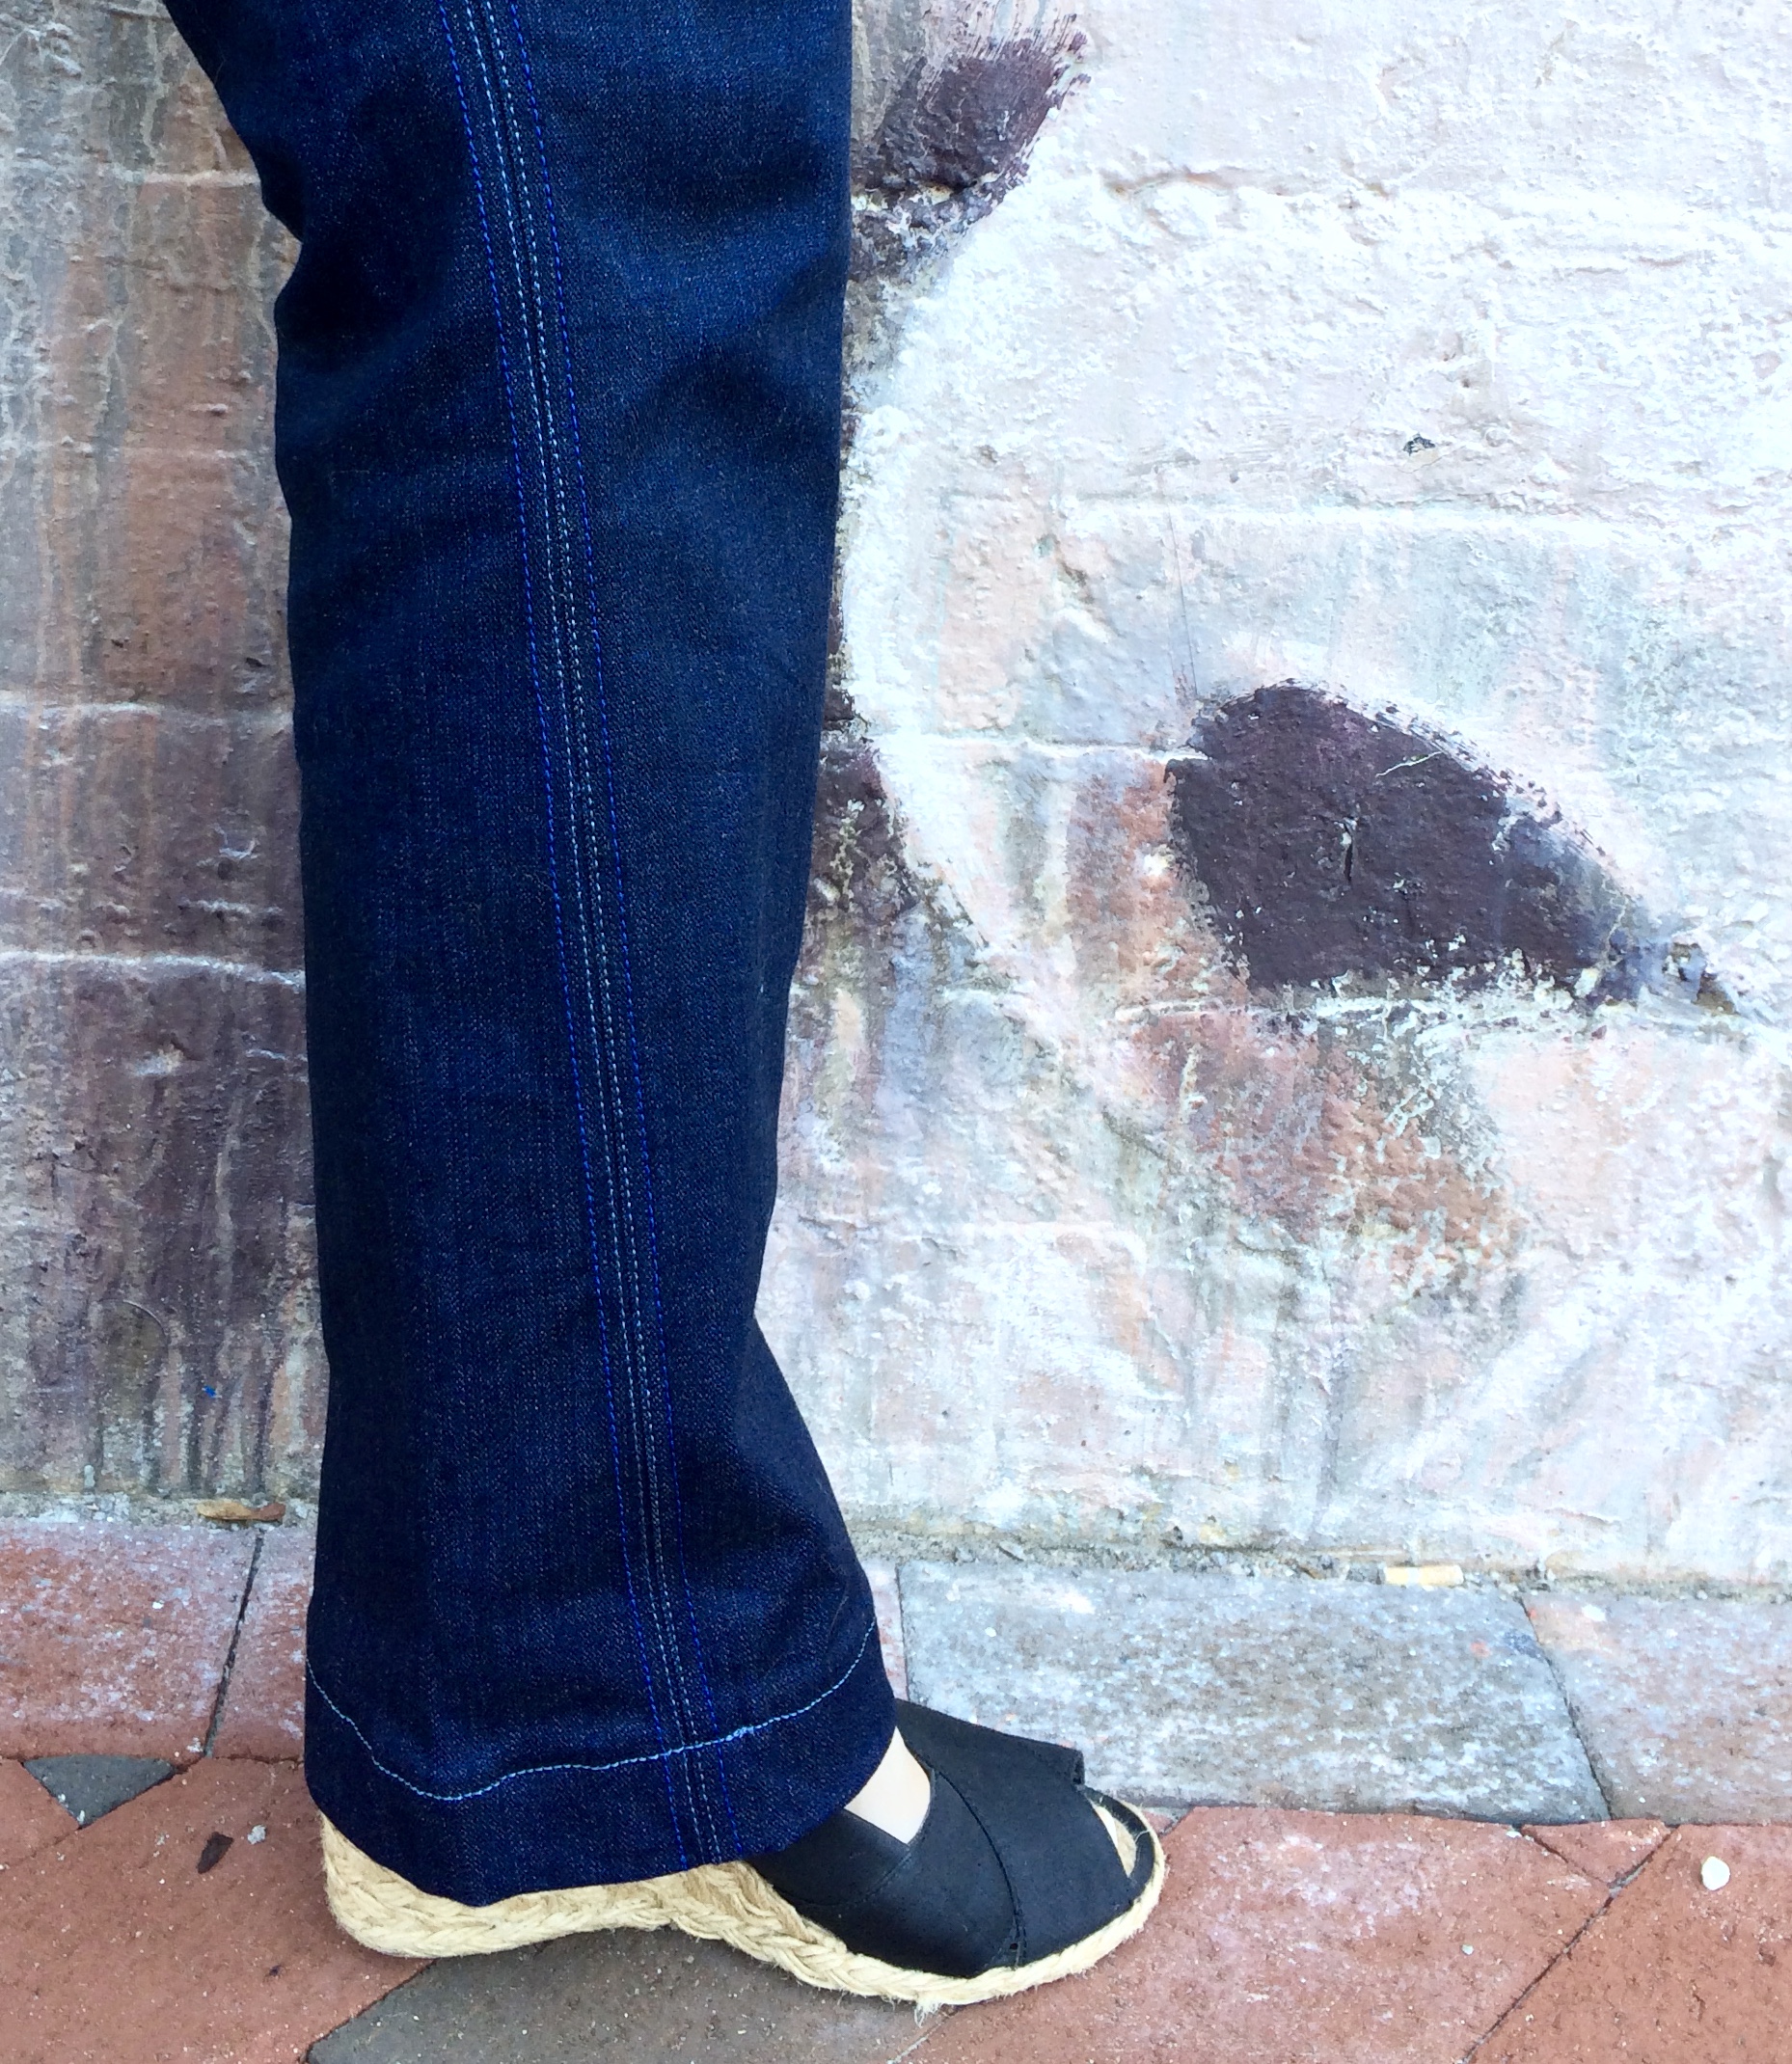
Up next: Another pair of Ginger jeans, this time in view B with a mid-rise waist and slightly widened legs

For now, I’m still using the original rolodex card dividers – C is for cotton, D is for denim, F is for fleece and felt, H is for home decor, K is for knit…

IMG_7963

Not all of the cards have the same categories of information – it depends on how thorough I am feeling when I catalog it – but I always try to include my best guess at fabric content, the width and length of the fabric, and a small swatch. I also like to include when and where I bought it and for how much money, and if I have washed/dried the fabric already.

After I’ve finished a project, if I have fabric left, I update the card with the amount remaining and indicate what the first portion was used to make and when.
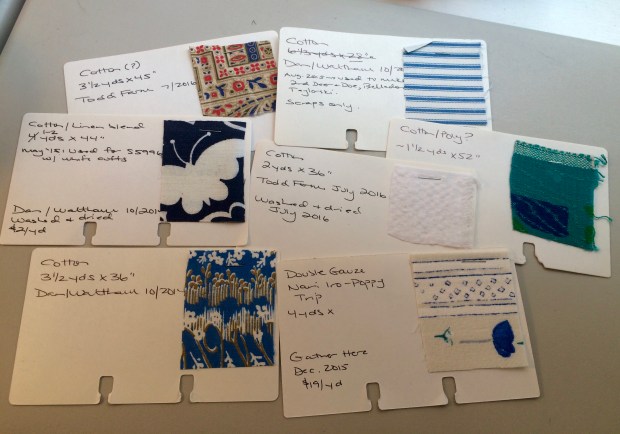
IMG_7966

A random sampling

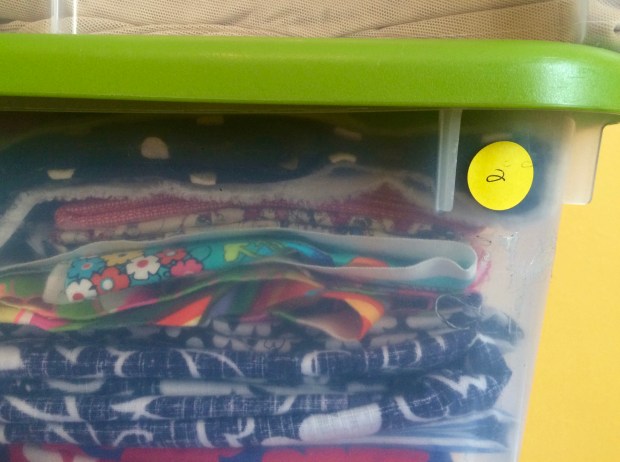
I also have a sticker on the back of each card telling me which tub it is stored in.  I just made this update recently and it has already saved me a lot of time.

IMG_7969

A corner of the guest room

IMG_7973


If I was truly as organized as many people think I am, I’d also keep an Excel spreadsheet tracking my totals (in & out) so I would always know exactly how much fabric I have on hand, and I’d have an app on my phone with all of this information so I could access it when I just happen to accidentally find myself in a fabric store (how in the world did I get here?!?!?), but I’m not there just yet.

I also have a fairly large collection of sewing patterns – both vintage and modern.  This post, also from Colette Patterns, taught me how to best store and organize those.  I still have a bit of fine-tuning to do there, making the my categories more detailed and I do not have an electronic/portable database of those yet, but I’m making progress.

Kielo wrap dress: The hippie chick

I had to – er, I mean, got to – give this beauty away today.  The hem needed to be shortened just a bit, but otherwise, it looked like a perfect fit.

IMG_7951

There is not much left to say about this dress – I mean, it is the *sixth* one I’ve made. Here are the first, second, third and fifth (the fourth, done in a deep navy cotton/linen blend, was a gift and un-blogged).

IMG_7954

If I did not love the recipient of this dress as much as I do, I would have considered shortening the hem and moving it into my closet. The colors are even perfect as we move closer to autumn.

IMG_7955

Unfortunately, I did not have enough fabric to match the pattern down the back center seam, but I was able to make sure the edges of the medallion lined up in the back.

IMG_7957

All I have left are the tiniest of scraps – just maybe enough to make pockets for my next pair of Ginger jeans…

Pattern: Named Kielo Wrap Dress, size 4
Modifications: Facing for the neckline only, rather than the combination facing I had drafted for earlier versions, and shortened the hem to knee length
Fabric: 100% Indian cotton tapestry in navy with orange, turquoise, green and red

Kielo wrap dress: In the sun

This beauty isn’t for me; it’s for a friend – my very first friend who I met when I was about 4 years old – who kindly asked me to make it for her.

IMG_7748IMG_7755IMG_7758IMG_7762

Sewing for others is incredibly stressful for me.  When sewing for myself, I know what sort of “imperfections”, i.e., visible hand stitches, under stitching that is not perfectly straight, etc…, can be expected and can decide if I am okay with how something turned out or go back and try to fix it.  When sewing for others, I do not allow myself any wiggle room,  and often find myself dreading that I agreed to make something for somebody else.  That said, I know very well, that when somebody makes something for me, I never think it is anything but a generous gift made with kindness.  I suppose the best thing I can do is to keep sewing for others and hope I get over it, eventually.

Pattern: Named Kielo wrap dress, size 10
Modifications: Self-drafted combination facing, shortened length, narrowed “wings” for better fit at the waist, lengthened ties for wrapping
Fabric: Nicole Miller “In the sun – multi” twill, 97% poly 3% spandex


Simplicity 1462: Copy cat

I’ve wanted to make this exact top since a seamstress blogger I follow, Amanda from Amanda’s Adventures in Sewing, posted hers almost a year ago. I’d find myself thinking about it every time I was looking through my closet for a top to wear with jeans.  I bought the pattern earlier this year, but it took me a bit to buy the fabric (I’m in a constant battle with myself over my gargantuan fabric stash).

Well, I finally made it.  I found both the neckline (which Amanda was right – the neck binding piece is drafted at least two sizes too large) and underarm seams a bit fiddly.  This led to my initial thought that this pattern seemed like a bit more trouble than any top is worth. However, the more I think about it, it is the day-to-day wears, that deserve time.  They get worn far more often than the fancy vintage Vogue cocktail dresses, that’s for sure.  I also realized I may be biased after making several versions of the easiest dress ever.

IMG_7707

The twinning on the bottom left side of the top is making my brain hurt. I wish I had caught that earlier.

IMG_7708IMG_7710

Pattern: Simplicity 1462 View B
Fabric: Anna Maria Horner Raindrops & Poppies 100% cotton with grosgrain ribbon trim

And a rare “in the wild” photo, taken at Nota Bene:

14034742_925397627604134_5594596167282619065_n

Despite the finicky bits of this pattern and the fact that I have some additional changes I’d like to make (my armholes are too large), I really like this top and have already started to consider another version in a more subdued color palette.

Pattern: Simplicity 1462, size 12
Modifications: Removed 2″ in length and hemmed 2″, shortened the neck binding, extended the slit facing down to the hemline
Fabric: Anna Maria Horner Field Study1 Raindrops & Poppies cotton

Kielo wrap dress: Step one…

… is admitting you have a problem, right? Well, that’s done. Whether I’m willing to stop making these dresses is another matter. I’ve been tinkering with the pattern and this variation is pretty close to perfect for me. It is made from purple linen that I picked up at Mood almost three years ago.

IMG_7559IMG_7561IMG_7566IMG_7577

If you are interested in having a custom version of one of these dresses, please send me a private message. Sewing for others is stressful for me, but I appreciate people’s interest and am willing to give it a try. Turnaround time depends on how many dozens of you want one 🙂

Kielo wrap dress: Quilting cotton fireworks

Leave it to me to make a pretty simple dress more complicated the second time around. However, thanks to some re-engineering on the inside, in the form of a drafted combination facing, this one should hold up a bit better over time.

IMG_7531IMG_7529

I’ve had this vintage quilting cotton in my stash for a couple years now.  I’ve been itching to use it and felt the pattern on the fabric would look great on this dress — which it does.  However, the drape of the fabric made it a red decision, so to speak. It’s too stiff, causing it to ride up around my legs when I walk.  But I’m hoping a few trips through the washer and dryer will soften it up a bit.

Pattern: Named Kielo wrap dress, size 6
Modifications: Self-drafted combination facing, shortened length, narrowed “wings” for better fit at the waist, lengthened ties for wrapping
Fabric: Vintage quilting cotton


Kielo Wrap: My outdoor market dress

This is my *perfect* summer dress.  It also just happens to be made out of a tapestry I bought in the late 80’s/early 90’s, that was later used as a paint drop cloth (and there are green splatters of paint on this dress to prove it).

This was not intended to be a wearable dress; it was a practice run for a dress pattern by a designer I have never worn before. I had no idea I’d turn out loving it this much. The added bonus – it was super quick to put together. I can see myself making more of these for sure.

IMG_7513IMG_7514IMG_7515IMG_7521

My only concern with this dress pattern is that neckline and armholes are finished by simply turning under the fabric and stitching.  If I do make more of these dresses, I’ll likely draft facings instead.  I think they’ll hold their shape a bit better over time. Plus then there will be no visible stitching besides the hem.

Pattern: Named Kielo wrap dress, size 6
Modifications: Shortened to knee length
Fabric: Light cotton tapestry/former paint drop cloth