Whenever I tell people I make my clothes they seem surprised at first, then nod their head, and say something about how their grandmother or mother used to sew. But there are a few items, that non-sewing people almost always struggle to believe I made myself – bathing suits, jeans and bras. Do they think they are traditionally made by machines? They’re also three things that many women hate shopping for, myself included, largely because finding the right fit is incredibly difficult due to the wide variety of lovely shapes women’s bodies come in.
I tackled bathing suits back in 2013 and have a Sophie Bikini on my short list for this year; jeans were the scariest of the lot to me, but now, six months and three pairs later, I almost take for granted that I can make a new pair anytime I want; but bras, well, those took me a little extra nudging.
I made my first bra at Camp Workroom Social last October:
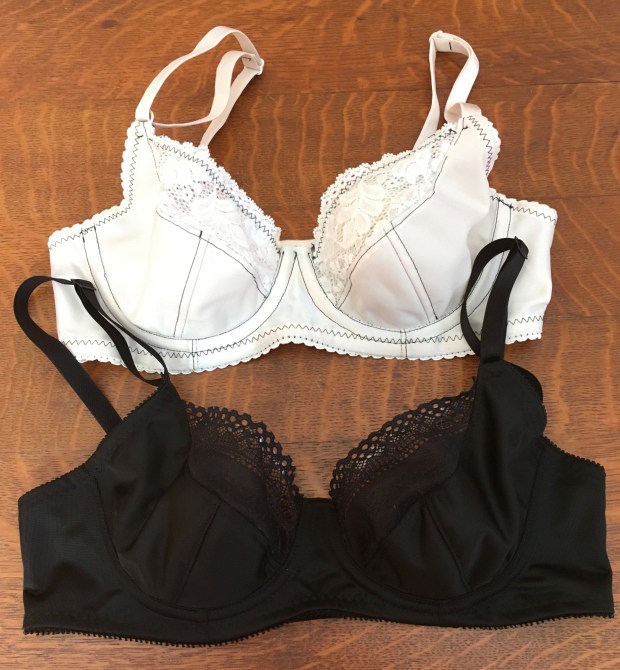
Two Harriet bras, designed by Cloth Habit. The top one is a muslin used to test the fit.
I came back from camp excited and determined to replace every single ready-to-wear bra in my drawer. I ordered fabrics and supplies. And then the doubt crept in. You see, at camp, I had the bra’s designer and two ridiculously capable seamstresses helping me every step of the way, explaining which fabric to use where, what stitch length and width was best, reminding me to sew the elastic with the plush side up on the good side of the fabric first… Now I was on my own (well, as on my own as one can be with Google). Every time I glanced in the direction of my box of supplies I got overwhelmed. Plus, there was the added issue of the fact that my camp bras did not fit me in a way that I was completely comfortable. Not only was the band far too tight, IMHO, causing back and under arm fat rolls that I simply could not tolerate, but the shape just didn’t do my girls any justice. So this time around, I wanted to use a thin foam lining. That was just another hurdle my brain struggled to get over.
Then, Closet Case Files posted a link to this post on Instagram. What a beautiful bra. And it was very similar to what I wanted to make – an Orange Lingerie Boylston bra in woven fabric. A fellow camper and I both commented that we hadn’t made a bra since camp and Heather nudged us on, reminding us that we had done it once and could do it again. So I did. I’m telling you, that woman could tell me to sew all my clothing inside out and I’d probably do it.

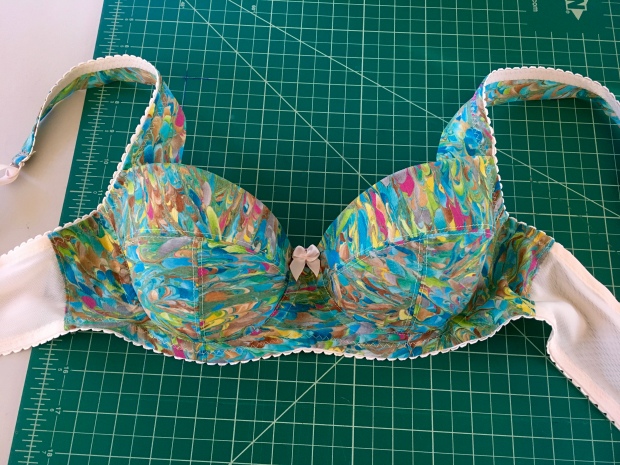
Just look at that beauty!
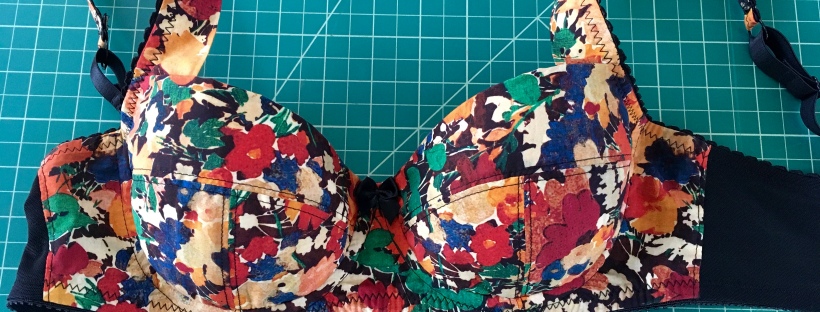
I printed my pattern, cut out my fabric, and got started on assembly on Sunday afternoon. I then worked on it for about an hour on Monday, and by the end of my class Tuesday night it was complete. And it is pretty much perfect. Even the fit.
You can almost see the crepe texture of the fabric in this shot
The fabric is a crepe that has been languishing in my stash for years (another piece from the estate of two deceased seamstresses that I purchased for <$2/yard). The pattern on it reminds me of the 80’s and I always assumed I’d use it for a small inside pocket or facing or a lining. But then when it came time to make my first Boylston, which is designed for light woven fabrics, it seemed like a good choice since I had no idea if the size I chose would fit and I wouldn’t be too distressed if it went into the donation bin.

The foam, elastics, hardware, underwires, bow, and secondary fabrics came from Bra Maker’s Supply plus a couple leftovers from camp.
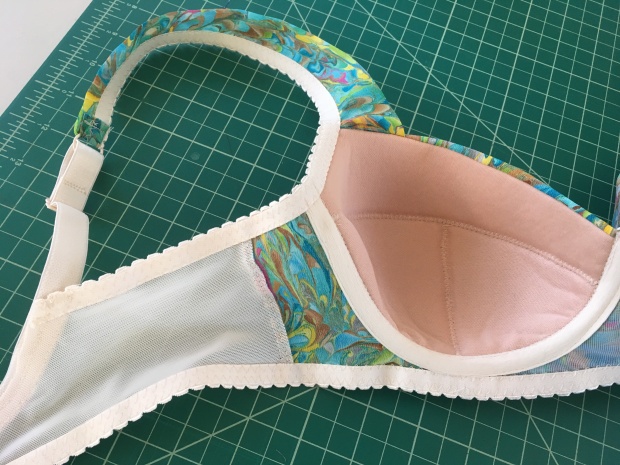
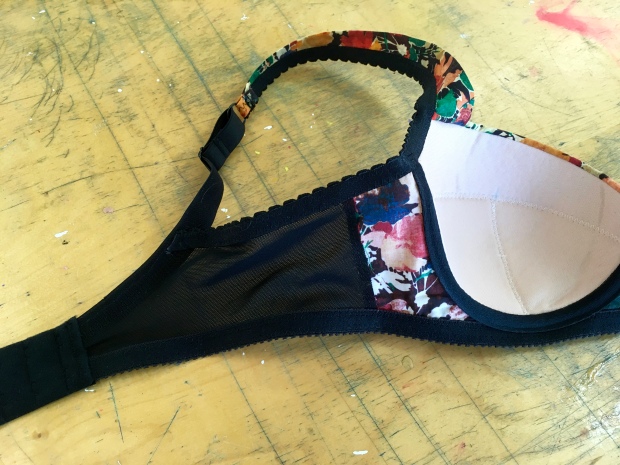
Nice and neat on the inside

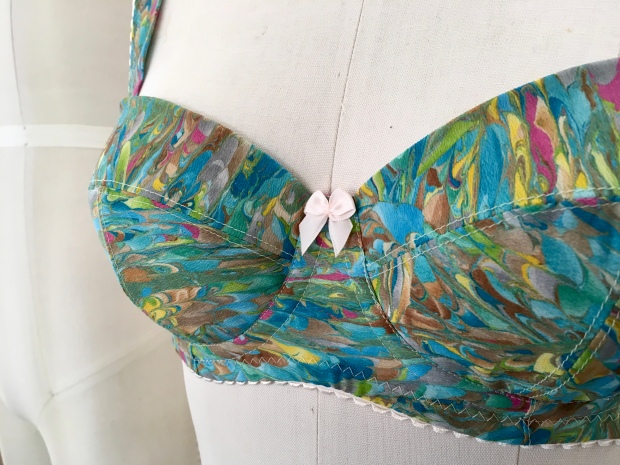
Close up of the front of strap where it meets the cup
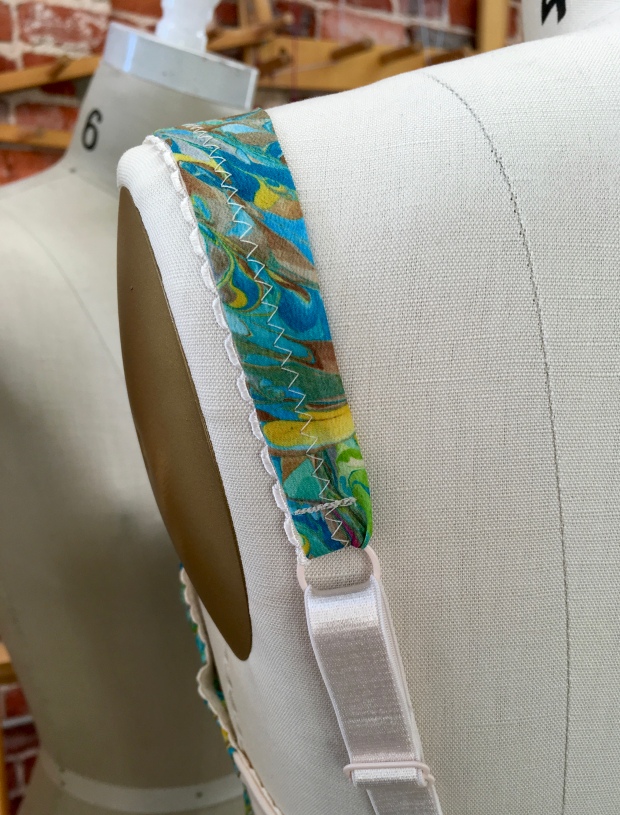
Close up of the back of the strap


I found this bra went together very smoothly, but I will say I found the directions a bit sparse, at least as a newbie. And the instructions include no information on adjustments you ought to make when using foam. So, if you decide you want to try this pattern out, I found Lauren’s two posts on foam cup Boylston bra assembly indispensable and basically just followed along with those (here and here). Lauren references a trio of posts from Cloth Habit on making a foam bra that I highly recommend following as well, especially Part II.

I had hoped to start my second Boylston bra this afternoon – I do have a drawer of ready to wears that clearly need replacing! – but got a bit sidetracked by life today. But I already have a special Liberty fabric, plus all the other materials I need, set aside and hope to have it done by the end of the weekend.
If you’ve been thinking about making a bra I highly recommend the Boylston. If you are feeling intimidated, give it a go with the help of the links above. And if I can be of any assistance, please let me know.
Pattern: Orange Lingerie Boylston Bra
Fabrics: Vintage crepe plus bra making supplies from Bra Maker’s Supply
Modifications: I slimmed the back band to fit into the two-hook closure and adjusted the foam cup seam allowances before butting them together under a zigzag stitch – that’s it!
Photo Location: Visual Arts Center of Richmond Fibre Studio