Strappy Simplicity 8229 & Bella Panty

Because not all lingerie in intended for daily wear.

You can thank Madalynne for inspiring this project. The minute I saw her take on the $675 Agent Provocateur set, I knew I needed to make my own version.

IMG_3866

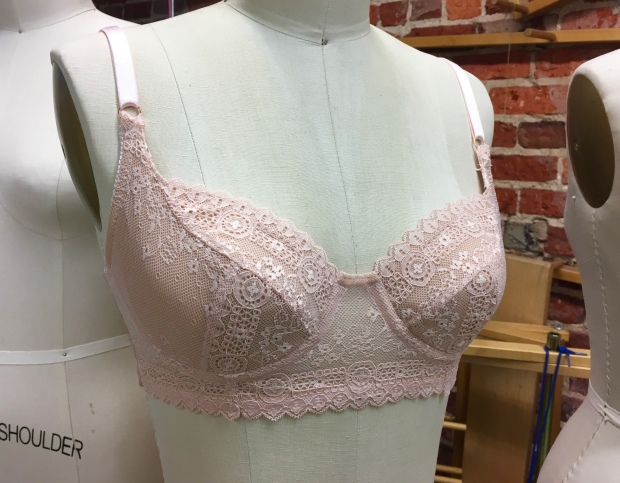
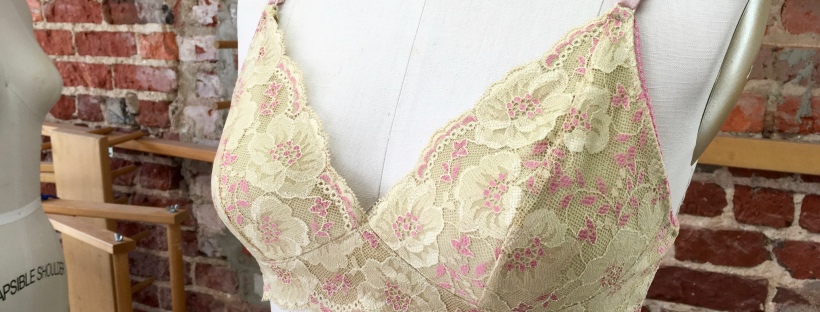
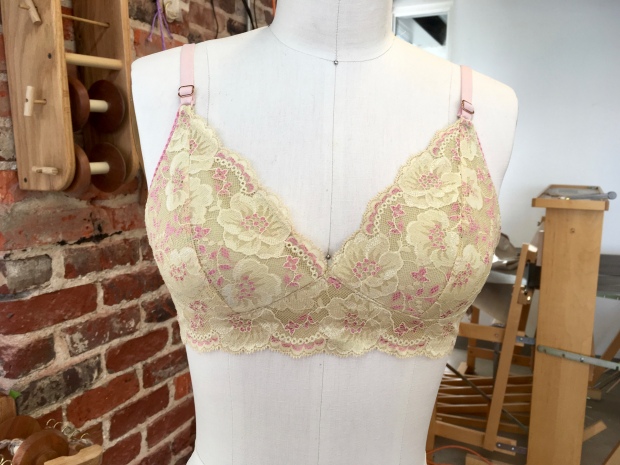
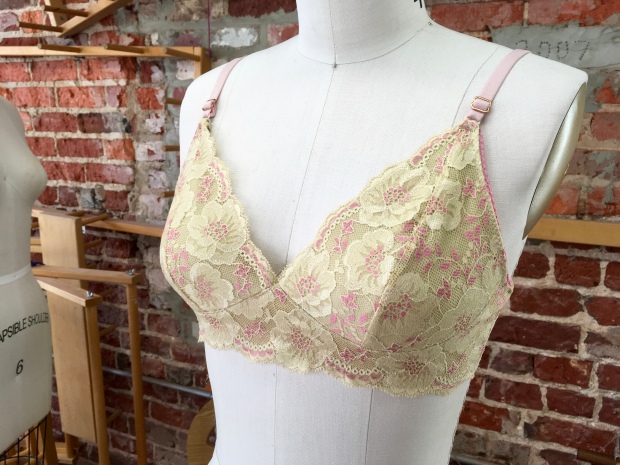
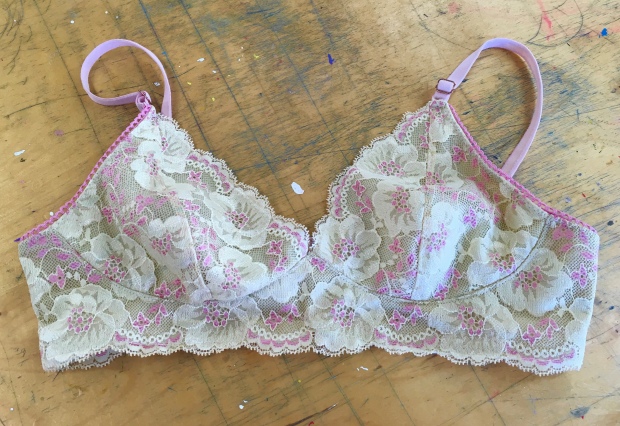
My loveliest lingerie set.

It is a super-strappy variation of Simplicity 8229 (previous versions here) paired with a modified Evie La Luve Bella panty.  That is five yards of strapping!

IMG_3880

This set took me a long time to make as a result of lots of tinkering with straps and fittings coupled with my usual inability to sew for long stretches without constantly stepping away to refresh my tea cup. But it was worth it. I think it is quite possibly the most beautiful thing I have ever made. And it makes me smile every time I look at it; in part because I know how hard I worked to get it just right.

IMG_3548

IMG_3528

IMG_3556

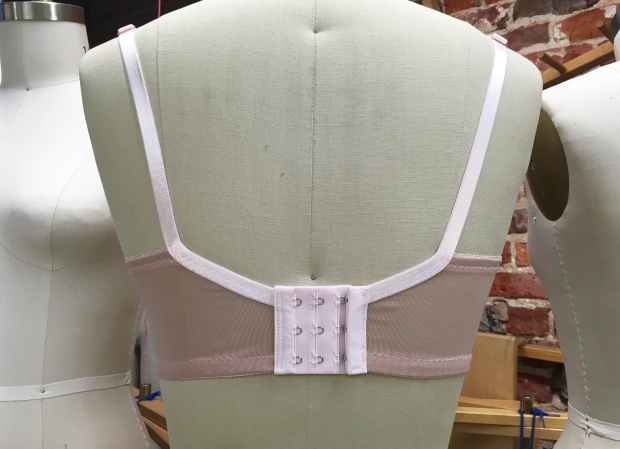
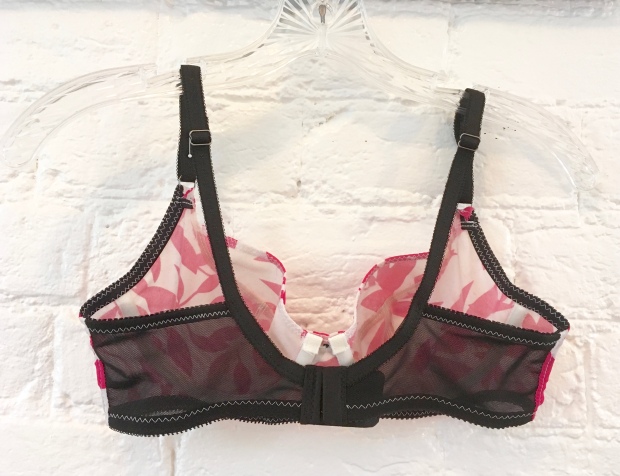
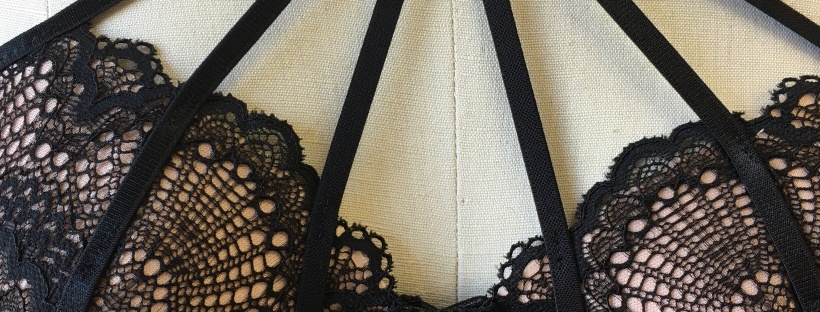
The four straps are attached at both the top and the bottom of the band for added strength.

IMG_3892

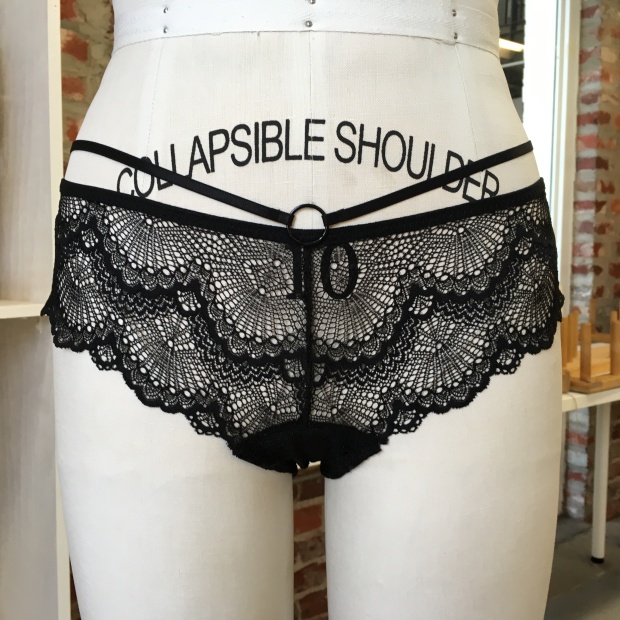
The Bella panty is sort of a boy-short in front…

IMG_3885

… and a cheeky tanga in back.

IMG_3888

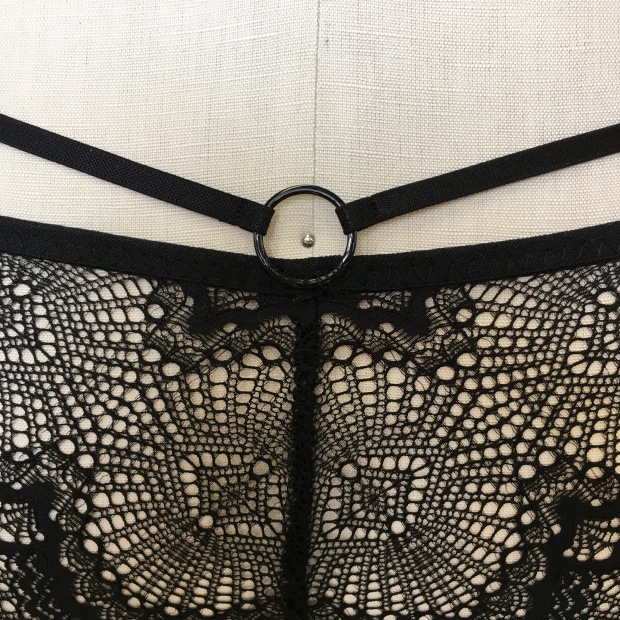
Just look at that symmetry in the lace!

If you are interested in making a version of this set for yourself, here are some notes that may be helpful:

My Simplicity 8229 modifications:

  • If you want the scalloped edge of the lace to run around the entire bottom band, then the band elastic is not turned under for finishing. You simply attach the 1/2″ or 3/4″ picot elastic with two rows of zigzag stitch on the inside.
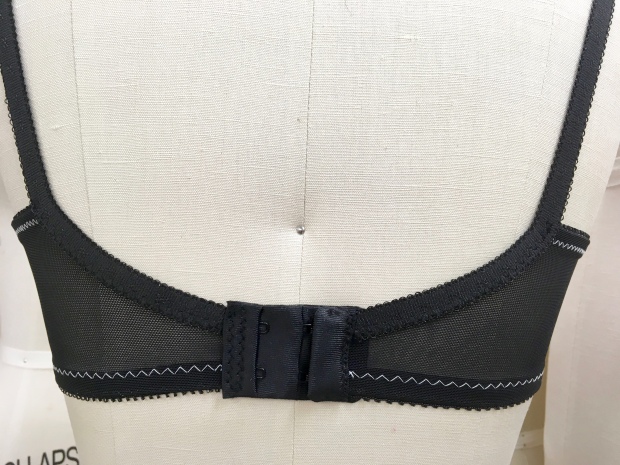
  • Adjust the band height at center back to accommodate a 2-row hook and eye (it is drafted for a 3-row).
  • I used cut and sew foam as the under-layer for added stability for the straps and overall boost.  Since the foam is sewn with abutting edges rather than overlapping with a 1/4″ seam allowance, be sure to trim those edges by 1/4″ before sewing together with a zigzag.
  • Since I added the straps by eye as I went, I did not mark the pattern ahead of time for the placement of the innermost strap.  But I believe it landed about 3″ down from the top of that seam line at center front.
  • The middle strap covers the seam between the inner and outer cup pieces and is tacked at the apex with a few small machine stitches.
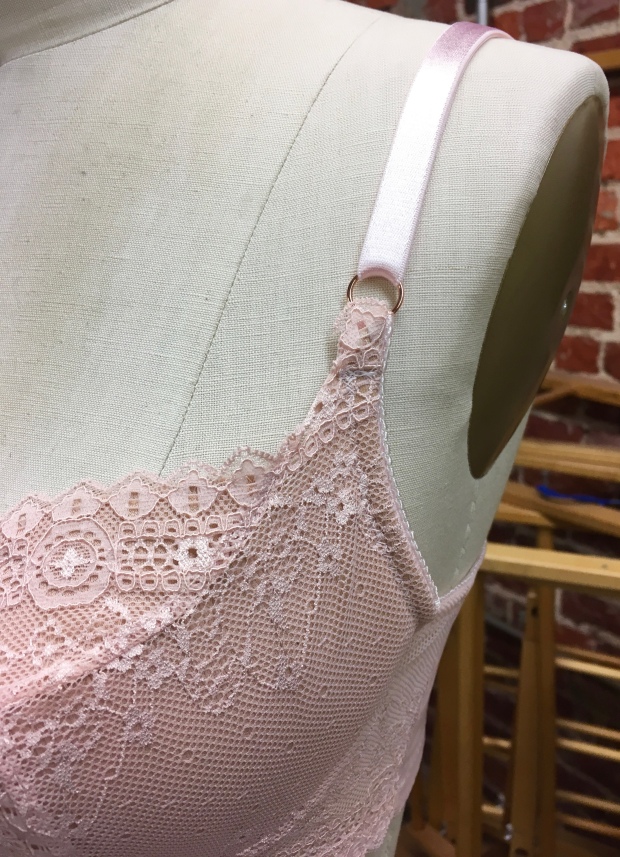
  • Per Maddie’s recommendation, I shaved just over 1/2″ from the top of each cup where it would normally attach to the shoulder straps (which are not used in this design).  This made that outer strap angle properly toward the metal center front ring. I attached that strap along the top edge of the bra starting at the underwire along the underarm.
  • All straps are tacked down with a few small machine stitches at the upper edge of lace along the top of the cups.
  • Each strap is attached separately at the center top ring, rather than running through the ring and then back to the cup or up over the shoulder.  And I did not use rings and sliders on the straps.  As a result, the straps have no ease beyond their elasticity so fit is crucial. Take your time.
  • The physics of my initial version – an almost exact duplicate of Maddie’s – did not work perfectly. I found that adding the second upper strap at the center front ring gave me the lift I was looking for. Plus I like the look of the extra straps in back.
  • The upper straps will peak out from under just about every item of clothing I have.  If that bothers you, you will need to plan accordingly and maybe add a Sewaholic Lonsdale dress to your sewing queue.

My Evie La Luve Bella panty modifications:

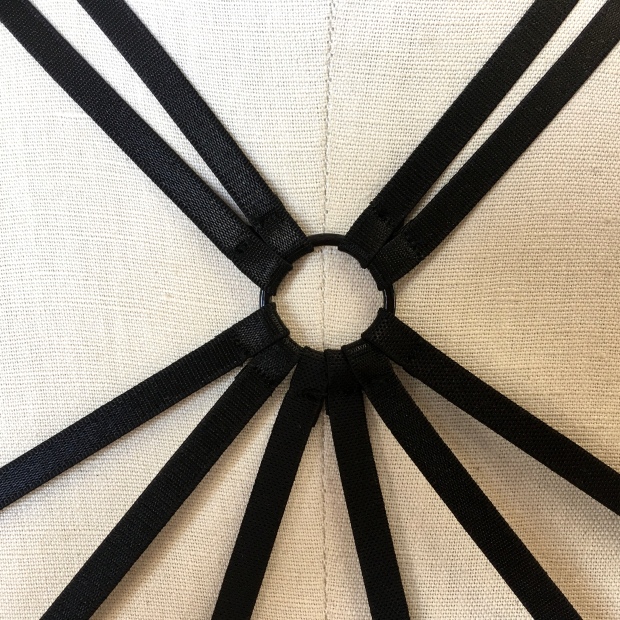
  • Simply add 3/4″ metal rings at center front and back. I hand stitched them.
  • Run 1/4″ satin elastic strapping from center front to center back on each side.
  • Getting the right strap lengths requires a few try-ons.  There is a fine line between sitting perfectly snug on the top of your hip and cutting in so tightly that a bulge is created in this spot where I, at least, want to avoid any bulge.

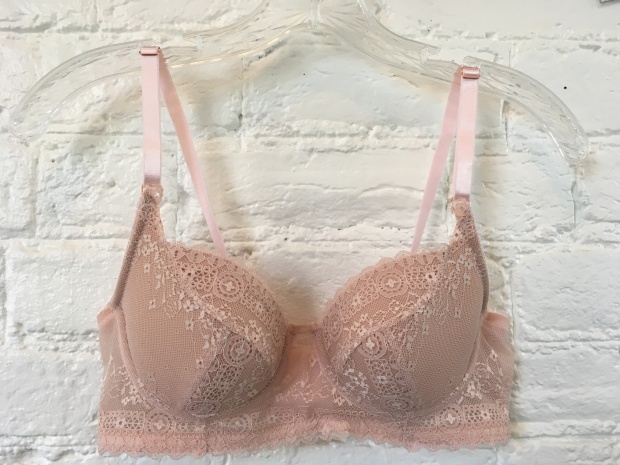
And maybe just one more photo of those lovely straps:

IMG_3544

PatternsSimplicity 8229 and Evie La Luve’s Bella panty, both modified
Fabrics: Gorgeous black galloon stretch lace and most other supplies are from my favorite, Tailor Made Shop; 1/4″ satin elastic strapping from MarySupplies; 3/4″ metal rings from Porcelynne
Modifications: Five yards of 1/4″ satin elastic strapping and a few 3/4″ metal rings
Photo Locations: Visual Arts Center of Richmond Fibre Studio
Thank you to Madalynne for providing the inspiration and some guidance on the modifications.
Soundtrack: Sigur Ros radio on Pandora

Harriet bra in lace with foam cups

I sewed a top this past weekend – an actual garment that I can wear outside my house without wearing other clothing over it.  And I am thrilled with how it turned out.  But I haven’t been able to take pictures of me wearing it yet. So instead, today, I will show you the bra I made last night.

img_1482

I love the Cloth Habit Harriet bra pattern.  It took me a few variations to to get the sizing just right, but now that I’ve got that sorted, it will likely be my go-to bra pattern for a bit.  And I learned last night that I love it even more with foam cups.

img_1473

I heard Amy is going to put together instructions for making the Harriet with foam, but I am impatient and decided to give it a try on my own.  I started by re-reading her step by step 3-part series, Making a Foam Cup Bra. If you want to give Harriet in foam a try now, I highly recommend it. Amy is a wonderful teacher.

I made this bra with a nude/pink lace kit from, you guessed it, Tailor Made Shop. I agree with others that nude bras can be a tad boring, but this lace makes it as not-boring as a beige-ish bra can be.

img_1481

Since I made this version with a lace outer layer, lining it up so the lace scallops extend up over the edge of the foam, I secured the lace to the foam with 505 adhesive rather than sewing with right sides together and flipping it as Amy does in the tutorial.  Then I simply tacked the lace to the foam in a few keys places where the stitching would not be too obvious.

img_1485

If you look closely, you can see where the foam cup ends, just at the bottom of the scallops along the upper bust edge.

As you can see, I left the lace scallops along the bottom of the bridge and cradle as well.  I simply attached picot elastic to the inside with two rows of zigzag stitches.  However, because I needed to turn under the elastic on the back bands in order to finish that edge, I had to cut the back bands a bit taller to accommodate taking the turned under picot elastic (since I wanted that finished piece to be as tall as the side of the cradle).

img_1461

Since I made the bands taller for this version, I was able to use a 3-row hook & eye tape without any additional adjustments. I’m still getting used to all those hooks in back, but they really do make the band feel much more secure without being tight.

img_1467

I should point out, that while the lace along the bottom of the front of the bra looks beautiful, it is not going to be a common modification for me. Within an hour or so, the lace is all bunched up under the cups.  Not really a good look or very comfortable.  So going forward, I think I’ll go back to turning the hem elastic under.

img_1464

But my goodness, that is beautiful, isn’t it?

The one item that I do not think Amy’s tutorial covers (because the bra style she uses in that series is different) is how to best manage where the cup pieces loop through the rings that attach the straps.  I suspect I should have done more trimming than I did – of either the lace, foam, or even both, and I am very much looking forward to learning how I could have done this better – but I just wung it, trimming nothing and pushing the top of each cup through the loop and securing it with a couple rows of stitches as usual (plus, I confess, a couple teeny tiny stitches to try to hold some rogue lace edges in place).

img_1477

So, if you’re a less-endowed woman like me looking for a little extra oomph, or just prefer foam cupped bras for whatever reason, I highly recommend trying the Harriet with foam. There is a little extra work up front with the pattern pieces, and the steps are a little different than with a traditional cup lining, but there are already resources out there to help (and there are more to come), and it is totally worth the extra effort.

One flat shot:

img_1442

Pattern: Cloth Habit’s Harriet, size 30D
Fabrics: Nude/pink bra kit from Tailor Made Shop, foam from Bra Maker’s Supply
Modifications: Adjusted shape of bridge and lengthened bands (same as in previous version) and adjusted the band height to accommodate the lace front lower edge
Photo Locations: Visual Arts Center of Richmond Fibre Studio

Harriet Bra in Silk Chiffon

Also known as, the prettiest item I have ever made.

img_1303

Have you ever finished a project and been so pleased with the results that you literally jumped up and down, hooting and screeching in pure excitement?  No?  Because that was me on Tuesday when I finished sewing this beauty.  I hadn’t even put it on yet.  I ran upstairs, busted into my husband’s office and could barely contain myself, pushing it in front of him to gaze at confusedly.  Then I tried it on. I’m super thankful it fit, because even if it had squished me into pancakes, I’m pretty sure I was still going to wear it.

This is my fourth Harriet Bra.  I made my first two at Camp Workroom Social last October; taught by the designer, the one and only Amy from Cloth Habit.  While I was thrilled to have made those bras and they felt comfortable at first, by the end of the day it was a very different story. But I love the design and shape it gives, so I was determined to keep trying.

img_1326

I made my third Harriet (un-blogged) a couple weeks ago, using a kit from Bra Maker’s Supply.  I did not make any adjustments to the pattern since I had a new and final version of the pattern and knew that Amy had made a few small adjustments since camp.  But the fit was still not right.  I thought the band was just too tight, so I added an extender giving me another 1″ of length.  But even with that, the center tips of the wires were digging into my sternum to the point of actually causing small bruises. Not a good look.

img_1327

After my trip to Philadelphia and making a couple of Madalynne’s Simplicity 8229’s, I realized that the shape of the bridge of my Harriet may be my problem.  So I traced the shape of the S8229 bridge and re-shaped the Harriet bridge to match. I also lengthened the back bands by 3/8″.  (So while my pattern size is 30D for the Harriet, my band is actually just over an inch longer than that.)

img_1269

You can see my modified bridge pattern piece here. The changes look small but are actually quite significant.

Those changes have made all the difference. This bra is not only beautiful, it shapes well – even without foam, and is comfortable.

img_1317

img_1320

A classic U-shaped back.

Most of the supplies for this bra came in a bra kit from the wonderful Tailor Made Shop. The outer fabric is another story. That is a silk chiffon that I picked up at Jomar-Swanson in Philadelphia last weekend.  I snatched it up as soon as I laid eyes on it.  My brain tried to talk me out of it – I rarely use drapey, semi-sheer fabrics in my sewing projects, and I really shouldn’t ever buy fabric again ever in my life – but having just come from a bra making workshop, I told myself that it could one day make a beautiful bra.  The yard of it cost me $2.  Totally worth it.

Though I will say, it was not the easiest fabric to work with. When I use it again for another bra and/or matching undies, I may try a stiffener to keep it from shifting around quite so much.

img_1335

I made view C and lined the bridge, cradles and three cup pieces with sheer lining. Since I was not using a lace upper cup, I followed the instructions for view A for that portion.  For those looking for the nitty gritty, I cut the fabric and lining as one for the upper cup (using 505 Spray & Fix), lining the top edge along the selvedge to avoid fraying and finishing with 1/4″ clear elastic, but cut all other pieces separately so I could follow Amy’s instructions to get a nice neat inside with no exposed seams. I used power mesh for the band and a 2-row hook and eye since that fit the height of the band best.  I may  modify for a 3-row hook and eye for my next version.

img_1340

Rather than cut the casings at the stitch line at the center front, I fold them down for just a little extra padding underneath where they make contact with my skin.

And yes, there will be more versions.  Though I may stop blogging each and every one of them since my guess is that it is getting a bit annoying.

Pattern: Cloth Habit’s Harriet, size 30D
Fabrics: Outer silk chiffon from Jomar-Swanson, other findings from Tailor Made Shop
Modifications: Adjusted shape of bridge, lengthened bands
Photo Locations: Visual Arts Center of Richmond Fibre Studio

Watson Bra in lace

Continuing on my quest to make my perfect bra, I decided to give the Watson Bra, by Cloth Habit, a try.

img_0663

I may be the very last seamstress on the planet to make this bra, I know.

This is the first non-underwire, non-foam cup bra I have worn for more than a day in years.  Padding has always been my friend.  While the shape this bra creates is not my most flattering and it’s not the most supportive bra I own, it is more comfortable than any of my other handmade bras so far.  I can definitely see wearing this on days when I don’t leave the house (most days when you work from home) but bother to change out of PJs or workout clothing (less often than I’ll ever admit) and days spent puttering about, running errands, etc… Oh! and I wore it to sewing class last night, of course, since it is my most recent make.

img_0674

I made this bra using: the Trio Dijon bra kit from Bra Makers Supply; pink underarm elastic that I had in my stash; plus sliders, rings, hooks, eyes and light pink straps that I cut off one of my ready-to-wear bras.

img_0677

As you can see, the straps I salvaged off one of my RTW bras are just barely long enough – I have them fully extended without a millimeter to spare.

I did not like this bra kit. The fabrics included were unlike the fabrics I’ve received with other bra-making kits, even from Bra Maker’s Supply. There was no sheer lining. Instead, this kit included a stretchy and almost cushy fabric in addition to the lace and powernet.  As a result, the bra feels a bit thicker than I had intended and the insides are downright unattractive since said fabric refused to stay flat for topstitching. Plus, I think a non-stretch lining would have lifted the girls up a bit more.  I went back to the website to see if I maybe ordered something incorrectly or at least get details on what this fabric is (I am still  new and learning about the array of fabrics one uses to make bras) but this kit is no longer listed.  Oh well.  Lesson learned.

That said, if you are new to bra making, or just want to avoid the headache of tracking down all the supplies, I still think bra kits are a great way to go.  I just ordered five — yes five — from the best of the best in bra kits, Tailor Made Shop (my argument being that I *saved* money since I qualified for free shipping).

img_0662

After following the measurement guidelines included with the pattern, I made a 34B. This is the same size as my Orange Lingerie Boylston Bras, but a different size than the Cloth Habit Harriet Bra I made at Camp Workroom Social in October (size 30D, but that band is just far too tight for me; I’ll be lengthening that the next time around).  I recently measured myself for a Madalynne 8229 – which I’ll be making at one of her workshops next month – and I measured a 36A.  Perplexing.  And further proof that the number (and letter) on your tag does’t mean a whole lot.

Here is my one and only flat shot.

img_0682

As for visible seam lines under clothing — an important factor for me when considering underpinnings: the scalloped lace around the neckline definitely camouflages that edge under clothing, making that line invisible.  But the cup seams still show through a well-fitted t-shirt.  That may be due to the somewhat bulkier than normal lining fabric. More research is needed, but this bra is definitely less visible under fitted clothing than either of my Boylstons so far.  Am I the only person considering creating an Excel table showing the pros and cons of each bra style I try?

I will be making more of these, for sure.  But, I have a couple different styles to try before that in my queue.

Pattern: Cloth Habit Watson Bra
Fabrics: Trio Dijon bra kit from Bra Maker’s Supply, plus elastics, hooks, etc… from stash
Modifications: None, this was essentially my muslin
Photo Location: Visual Arts Center of Richmond Fibre Studio