One of the primary reasons I sew is to avoid judging my body against industry standards every time I try on a ready-to-wear item of clothing. Sewing has empowered me to never need to step into a store changing room again. And if there is any task that instills fear and dread in most women, including me, it is trying on ready-to-wear swimsuits. Most of us would rather wear the suit we own, despite its condition, than shop for a replacement.
Enter, my Evie la Luve Mimi bikini.

As soon as I spotted this pattern on Hannah’s IG feed, I knew I needed to make one. I love her patterns. Her instructions are spot on. And I love this design. I waited patiently for the pattern release. I bought and downloaded it within an hour of it becoming available. Then I got intimidated, knowing the pattern would likely need alterations. So it sat and sat and sat in my sewing queue while I cranked out perfectly-fitted lingerie sets instead.
Once I convinced myself to just make it already, I learned I was right. It took three attempts and quite a few modifications for me to get this suit to work for me. But in the end, it was totally worth it (obviously).
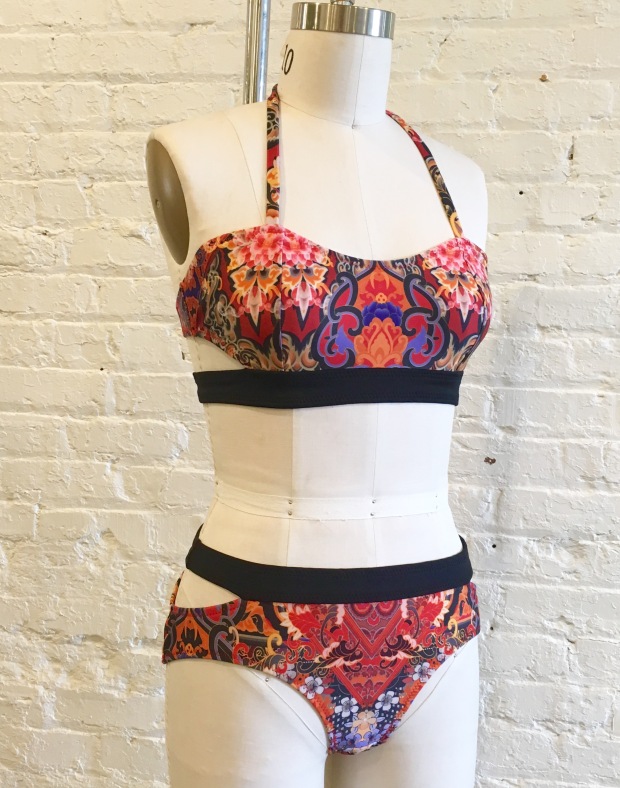
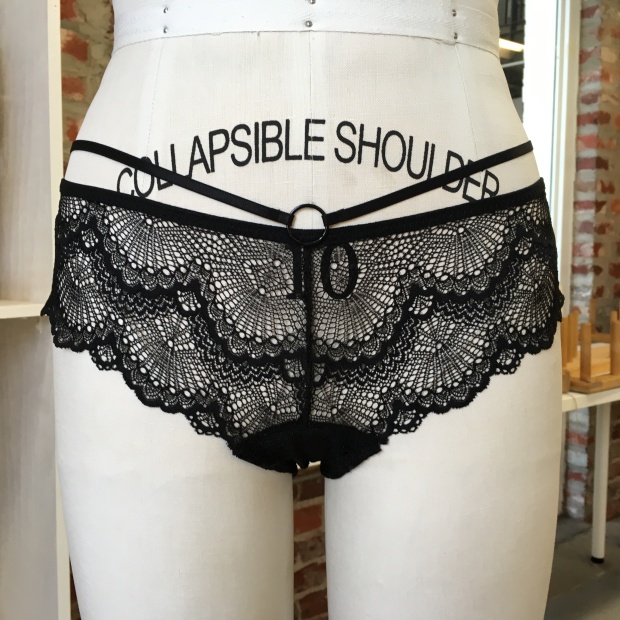
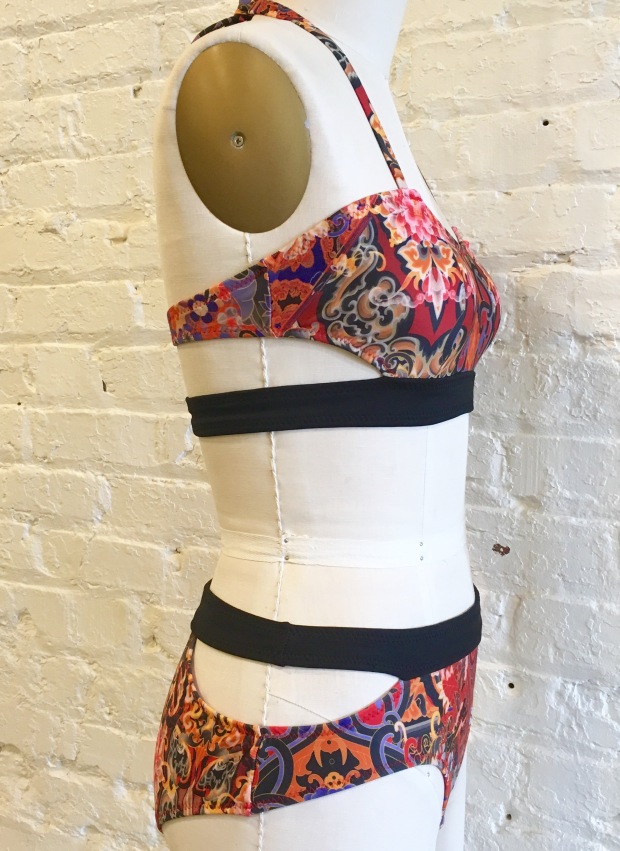
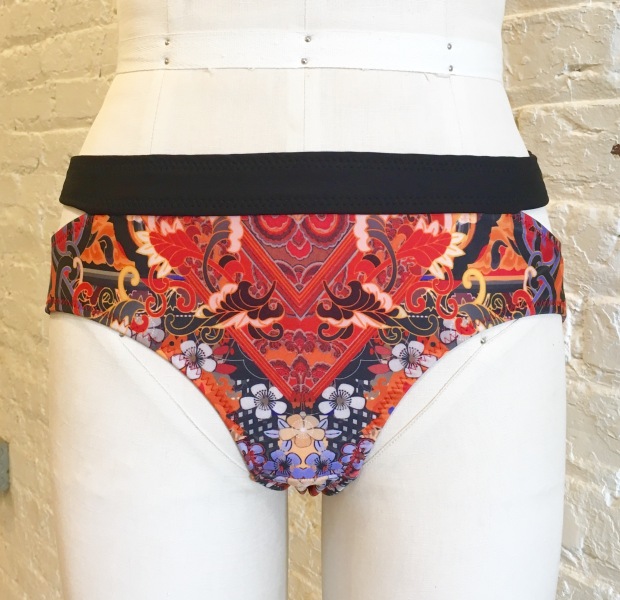
Based on the size chart provided with the pattern, I sewed an extra-small top and an extra-large bottom. (Another bonus to sewing your own swimwear is flexibility to mix and match the sizing of the pieces). With a full hip measurement of just a smidge over 40″ I probably could have sewn the bottoms in large, but I tend to round up with anything concerning fit around my bum. As a result, and as expected, my first pair ended up too big around the waist and hip. But in the long run, given the modifications I ended up making, that size choice was a good one.
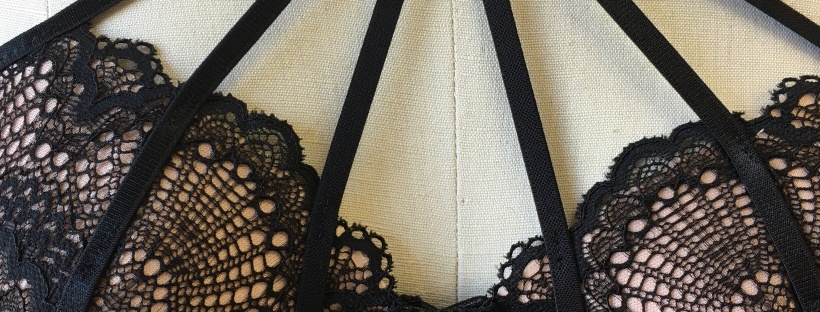
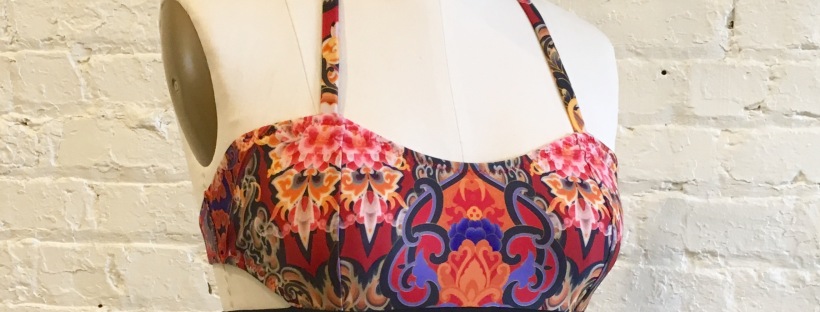
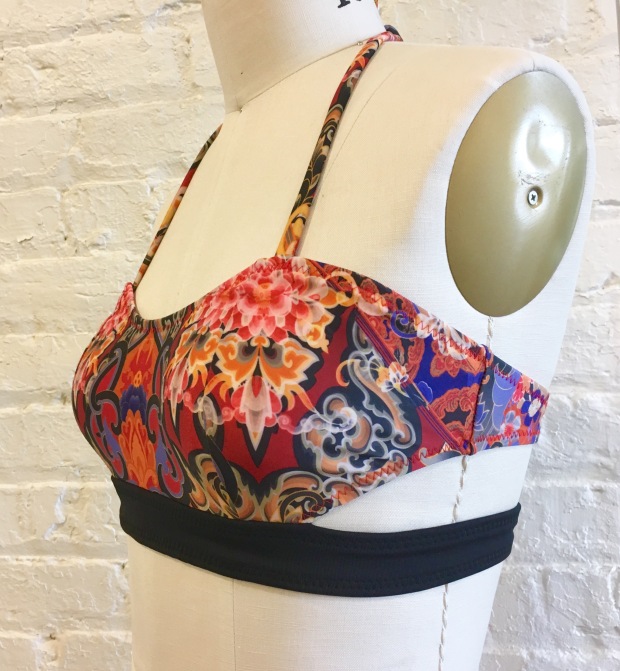
I did not make any design changes to the bikini top. However, if I were to make it again (a 4th time), I may shorten the princess seams and drop the upper edge / neckline by 1/2″. As Ying explains in her pattern review, this top was drafted for a larger cup size than I am, so the neckline is a little high and may be a tad too modest on me.
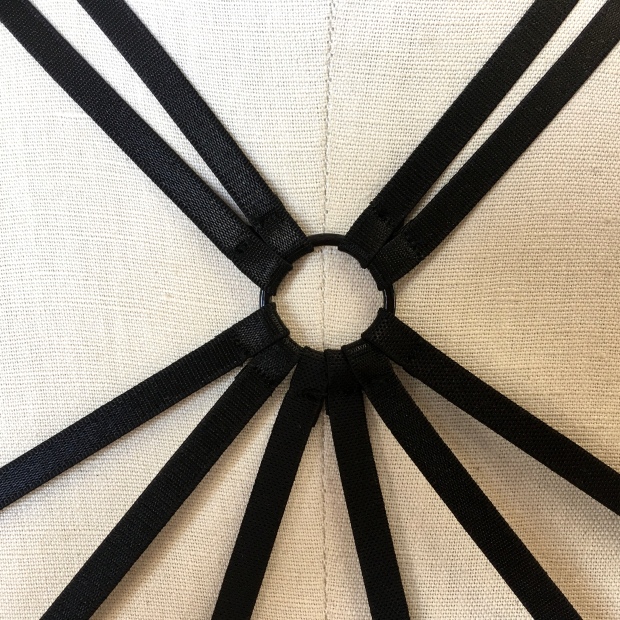
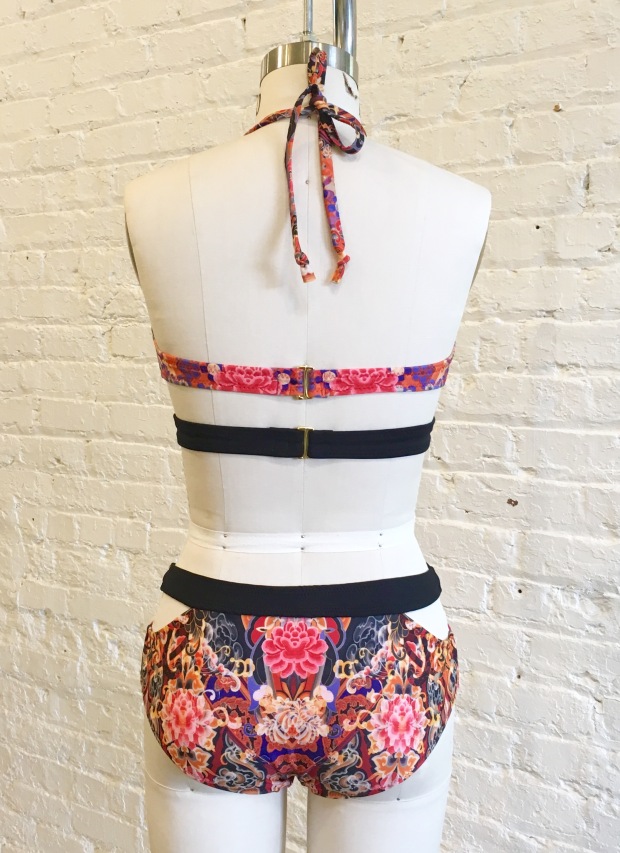
I should share, if you ever sew swimwear, this pattern includes instructions on a superb construction method for swimwear straps. (There is also a video on her YouTube channel.) There is no visible stitching and they sit nice and flat. I’ll be making all my swimwear straps this way going forward.
However, I did make one small adjustment when making the straps. I do not like the bulk that results from folding the strap back on itself when attaching it to the bikini top (done to avoid any raw edges from showing). On this version, when I assembled each strap, I trimmed 1/2″ off the length of the elastic before attaching it to the fabric and turning it inside out. This meant the bottom 1/2″ of each strap was just a double layer of fabric. So when I attached the strap to the top, tucking the end under, there was less bulk since there is only one layer of elastic. Very minor change, but I prefer the result.
Here are the modifications I made to the bikini bottoms:
- I’m petite (barely 5’2″ on a tall day) and short-waisted, so these were a very high-rise bottom for me, with the upper band landing just below my navel. I did not like the look. To fix this, I did two things, I:
- shortened the front main and back main pieces by 1/2″
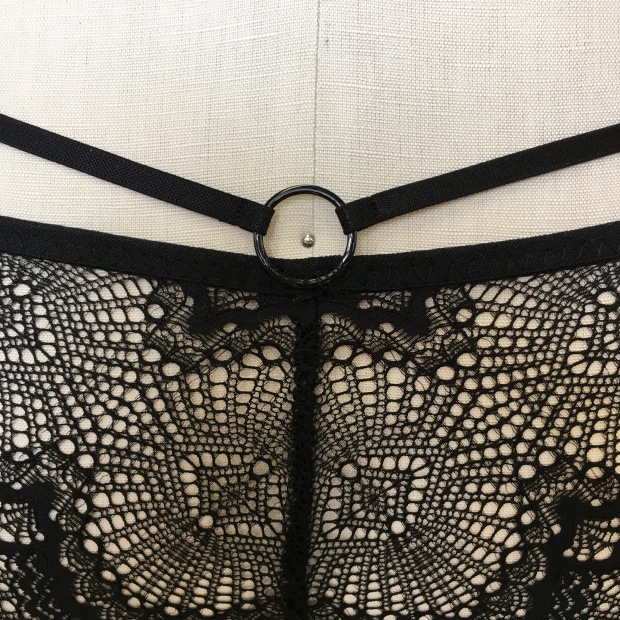
- attached the upper band in the front and back at the line for the medium pattern piece rather than the extra large piece, essentially trimming another 1/2″ off the top. This modification also made the cutouts on the sides of the bottoms smaller, which I prefer.
- The leg opening was very low cut in the front on me, fitting almost like a boy-short. I trimmed 3/4″ from the front leg opening at the center point between the hip and crotch seams, fading to nothing at those seams.
- I trimmed 1/4″ from the back leg opening at the center point between the hip and crotch seams, fading to nothing at those seams, making the back of the suit slightly cheekier. We’ll see if I regret that once I walk around in it a bit.
- I tinkered with the length of the upper front/back band so many times I can’t be sure, but I believe I ended up shortening that by about 1/2″. Having that piece the correct length is critical to avoid gaping, or even worse, the dreaded bulging in the cutouts. The fit of this strap alone makes creating a sample garment first well worth the cost in supplies, IMHO.
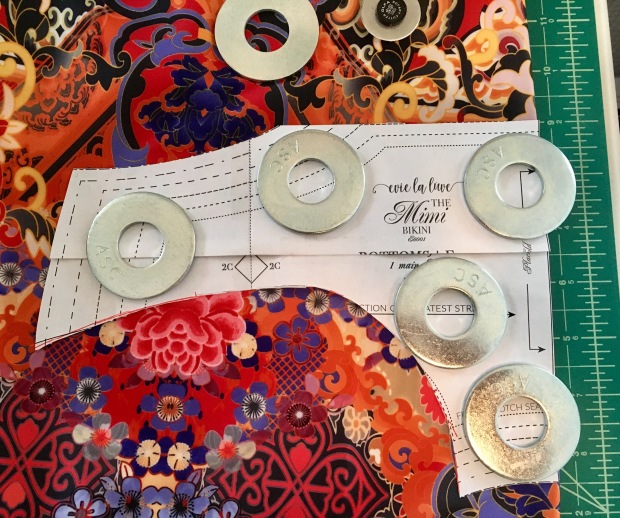
My final front pattern piece
I am not sure this is the best bathing suit design for my body shape. (Is there such a thing, though?) But I love the cutouts, these two fabrics paired together, and that I will certainly not see anybody else wearing it. And I especially love that I made it.
It is unlikely I’ll get weather warm enough to wear this suit before my trip to Mexico in November. But if you follow me on IG (@sarahycurtis), you’ll likely see pics of me wearing it lounging around the pool sipping a beverage, or two, then. Cheers.
Patterns: Evie la Luve Mimi Bikini, modified
Fabrics: Marrakesh Paisley nylon/spandex and solid black nylon/spandex swimwear fabric and nylon swimwear lining from The Fabric Fairy
Findings: (2) 1″ gold g-hooks and 3/8″ rubber swimwear elastic from Tailor Made Shop
Modifications: The bottoms needed to be modified to better suit my shape, details above
Photo Location: Visual Arts Center of Richmond