I sewed a top this past weekend – an actual garment that I can wear outside my house without wearing other clothing over it. And I am thrilled with how it turned out. But I haven’t been able to take pictures of me wearing it yet. So instead, today, I will show you the bra I made last night.

I love the Cloth Habit Harriet bra pattern. It took me a few variations to to get the sizing just right, but now that I’ve got that sorted, it will likely be my go-to bra pattern for a bit. And I learned last night that I love it even more with foam cups.
I heard Amy is going to put together instructions for making the Harriet with foam, but I am impatient and decided to give it a try on my own. I started by re-reading her step by step 3-part series, Making a Foam Cup Bra. If you want to give Harriet in foam a try now, I highly recommend it. Amy is a wonderful teacher.
I made this bra with a nude/pink lace kit from, you guessed it, Tailor Made Shop. I agree with others that nude bras can be a tad boring, but this lace makes it as not-boring as a beige-ish bra can be.

Since I made this version with a lace outer layer, lining it up so the lace scallops extend up over the edge of the foam, I secured the lace to the foam with 505 adhesive rather than sewing with right sides together and flipping it as Amy does in the tutorial. Then I simply tacked the lace to the foam in a few keys places where the stitching would not be too obvious.

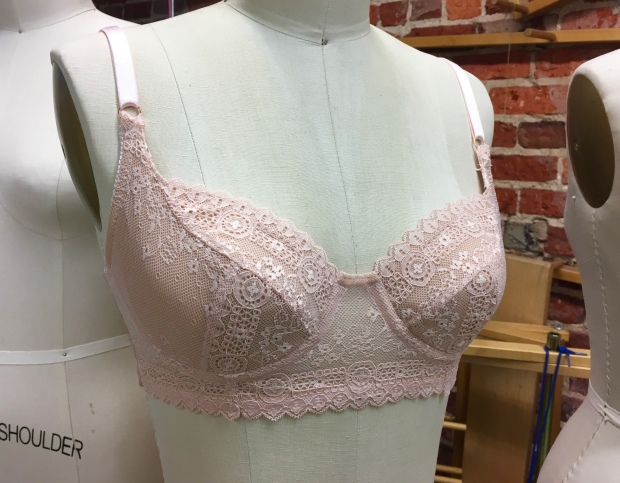
If you look closely, you can see where the foam cup ends, just at the bottom of the scallops along the upper bust edge.
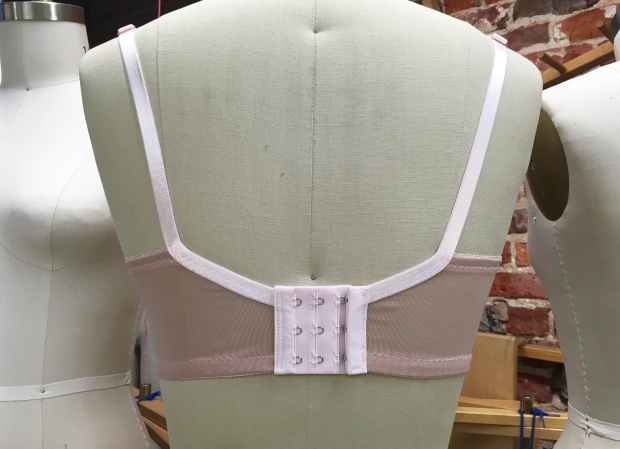
As you can see, I left the lace scallops along the bottom of the bridge and cradle as well. I simply attached picot elastic to the inside with two rows of zigzag stitches. However, because I needed to turn under the elastic on the back bands in order to finish that edge, I had to cut the back bands a bit taller to accommodate taking the turned under picot elastic (since I wanted that finished piece to be as tall as the side of the cradle).

Since I made the bands taller for this version, I was able to use a 3-row hook & eye tape without any additional adjustments. I’m still getting used to all those hooks in back, but they really do make the band feel much more secure without being tight.
I should point out, that while the lace along the bottom of the front of the bra looks beautiful, it is not going to be a common modification for me. Within an hour or so, the lace is all bunched up under the cups. Not really a good look or very comfortable. So going forward, I think I’ll go back to turning the hem elastic under.

But my goodness, that is beautiful, isn’t it?
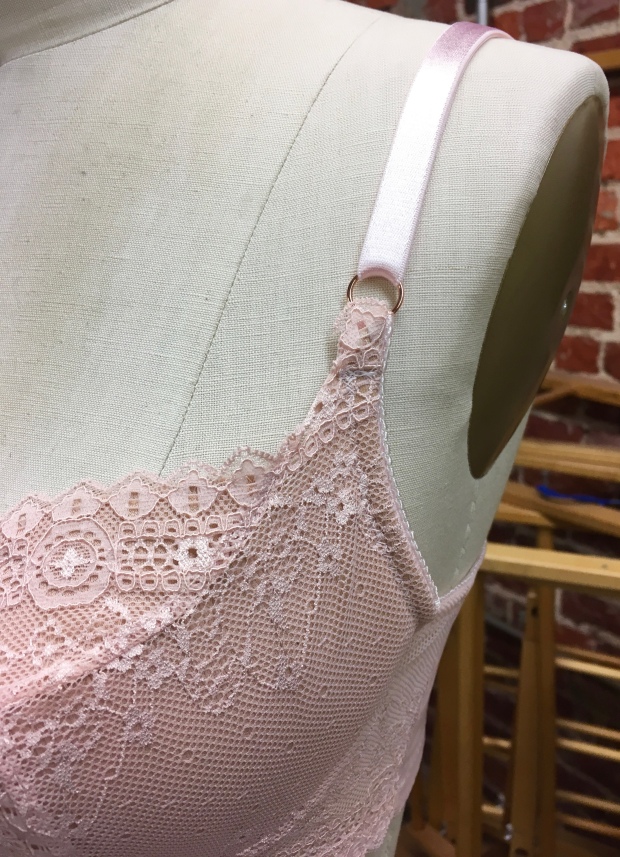
The one item that I do not think Amy’s tutorial covers (because the bra style she uses in that series is different) is how to best manage where the cup pieces loop through the rings that attach the straps. I suspect I should have done more trimming than I did – of either the lace, foam, or even both, and I am very much looking forward to learning how I could have done this better – but I just wung it, trimming nothing and pushing the top of each cup through the loop and securing it with a couple rows of stitches as usual (plus, I confess, a couple teeny tiny stitches to try to hold some rogue lace edges in place).
So, if you’re a less-endowed woman like me looking for a little extra oomph, or just prefer foam cupped bras for whatever reason, I highly recommend trying the Harriet with foam. There is a little extra work up front with the pattern pieces, and the steps are a little different than with a traditional cup lining, but there are already resources out there to help (and there are more to come), and it is totally worth the extra effort.
One flat shot:
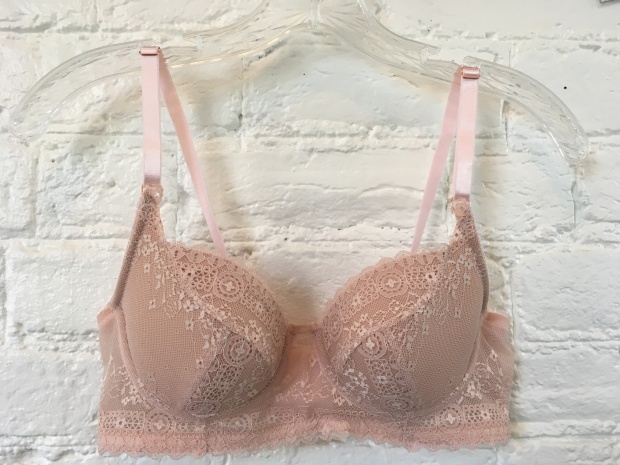
Pattern: Cloth Habit’s Harriet, size 30D
Fabrics: Nude/pink bra kit from Tailor Made Shop, foam from Bra Maker’s Supply
Modifications: Adjusted shape of bridge and lengthened bands (same as in previous version) and adjusted the band height to accommodate the lace front lower edge
Photo Locations: Visual Arts Center of Richmond Fibre Studio

Beautiful Bra! Good to know about the lace along the bottom of the bridge and cradle because it looks so nice that I thought I would make all my bras like that. When I start making them that is.
Many people do not have the issue I have with the lace along the bottom edge. It must just be something about the shape of my ribcage/torso. So once you get going, do not rule out giving that beautiful touch a try. And just a sneaky heads up, I am looking into renting a small studio starting in late summer. If I get it, maybe we can make bras there together 🙂
I’ve made Harriet and love her but really want to make a foam one, I did a part foam where the bottom to pieces are foam and I love it but would love to do full foam, I’m impatient too! I’ve cut the foam ready to try full foam so hopefully it will be ok.
Go for it! What fabric are you using over the foam? I still haven’t done one using something other than lace, but if you are trying lace and have any questions at all, please feel free to reach out. I’d be happy to help. Goo luck!
I was thinking on using some thin crepe, it’s got a satin effect one side and has a bit of stretch, I’m thinking in using some bias cut strips to cover the foam joins as tried a separate lining last time but it wrinkles when I’m wearing it and leaves a lot of dents in boobs (not the best look!) I see you can use a special tape but I don’t have any, it doesn’t fray so hoping to get away without folding under all the edges. Trial and error I think, I love the idea of the lace bridge, cradle and cups but wasn’t sure how to attach it to the foam.